A party makeup look is all about glam, confidence, and a little extra shine. Whether it’s a night out, celebration, or special event, your makeup should stand out while still looking polished and flawless.
This complete guide will help you create a party-ready makeup look at home, even if you’re a beginner.
What Makes Party Makeup Different?
Party makeup is usually:
- More defined and bold than everyday makeup
- Focused on eyes, lips, or both
- Designed to last for hours
- Suitable for low-light and flash photography
The key is balance—highlight one feature while keeping the rest elegant.
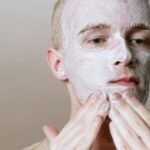
Step 1: Prep Your Skin
Start with clean, hydrated skin.
Apply:
- Moisturizer
- Primer (important for long-lasting makeup)
Well-prepped skin helps your makeup stay smooth and fresh throughout the event.
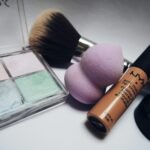
Step 2: Apply a Full-Coverage Base
For parties, go for a slightly higher coverage foundation.
- Apply foundation evenly across your face
- Blend well into neck and jawline
- Build coverage gradually
This creates a flawless canvas for the rest of your makeup.
Step 3: Conceal and Brighten
Use concealer to:
- Cover dark circles
- Hide blemishes
- Brighten under eyes
Blend properly for a seamless finish.
Step 4: Set Your Base
Set your makeup using a loose or compact powder, especially on:
- Under eyes
- T-zone
This prevents creasing and keeps your makeup intact.
Step 5: Contour and Bronze
Add definition to your face with contour or bronzer.
Apply on:
- Cheekbones
- Jawline
- Sides of nose (optional)
Blend well to avoid harsh lines.
Step 6: Add Blush
Choose slightly deeper shades like:
- Rose
- Berry
- Coral
Apply on cheeks and blend upward for a lifted look.
Step 7: Highlight for Glow
Highlighter is essential for party makeup.
Apply on:
- Cheekbones
- Nose bridge
- Brow bone
- Inner corners of eyes
This adds a radiant, glowing effect under lights.
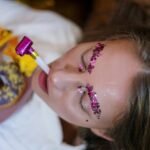
Step 8: Create Bold Eye Makeup
Eyes are the focus of most party looks.
Steps:
- Apply neutral base eyeshadow
- Add darker shade to crease
- Use shimmer or glitter on eyelids
- Blend well
You can create a smokey eye or soft glam depending on your preference.
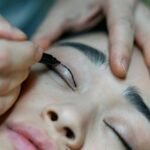
Step 9: Apply Eyeliner
Draw eyeliner according to your eye shape:
- Winged liner for dramatic look
- Thin liner for subtle glam
Make sure both eyes are symmetrical.
Step 10: Apply Mascara or False Lashes
Use mascara to:
- Add volume
- Lengthen lashes
For extra glam, you can apply false lashes.
Step 11: Define Your Brows
Fill in your brows to frame your face. Keep them defined but not too harsh.
Step 12: Choose the Right Lip Color
Your lip choice depends on your eye makeup:
- Bold eyes → Nude or soft lips
- Simple eyes → Bold lips (red, berry, plum)
Apply lipstick evenly and define with lip liner for long-lasting wear.
Step 13: Set Everything in Place
Finish with a setting spray to:
- Lock your makeup
- Reduce powdery look
- Increase longevity
This ensures your makeup stays fresh throughout the party.
Quick Party Makeup Routine
If you’re short on time:
- Full coverage foundation
- Concealer
- Compact powder
- Smokey or shimmer eyeshadow
- Mascara
- Lipstick
- Setting spray
This quick routine still gives a glam look.
Common Mistakes to Avoid
Applying too much foundation
Skipping blending
Using too much glitter without balance
Ignoring lighting conditions
Not setting makeup properly
Pro Tips for Party Makeup
Use long-wear and waterproof products
Blend thoroughly for a smooth finish
Focus on either eyes or lips for balance
Carry lipstick and powder for touch-ups
Match makeup with your outfit and event type
Final Thoughts
A perfect party makeup look is all about balance, blending, and confidence. With the right steps and techniques, you can achieve a stunning glam look at home without professional help.
Practice different styles, experiment with colors, and most importantly—have fun with your makeup.